Table of contents
Background
I have been learning Data Engineering as a part of my job where I am responsible to create data infrastructure in the Organisation. so why I have to write down my learnings as blog?
This tweet gives me clarity and the purpose of writing down our learnings. Without writing down, we’d become Dead Neurons, unable to revive what we learnt after few days.
Setting up big-data environment
Data Engineering or Big Data can be setup in the following ways:
- Local setup
- Virtual Machine
- Cloud Infrastructure
In this blog, we would see how to setup cloud and access via our local terminal. In the forthcoming blogs, we would see other setups.
Account Creation
- Go to AWS Console and create account
- If we register for the first time or with new mail ID, we are eligible for free-tier account automatically for 12 months.
Creating EC2 Instance
- We create Instances in EC2 which provides a wide selection of instance types optimized to fit different use cases.
- Instance types comprise varying combinations of CPU, memory, storage, and networking capacity and give us the flexibility to choose the appropriate mix of resources for our applications.
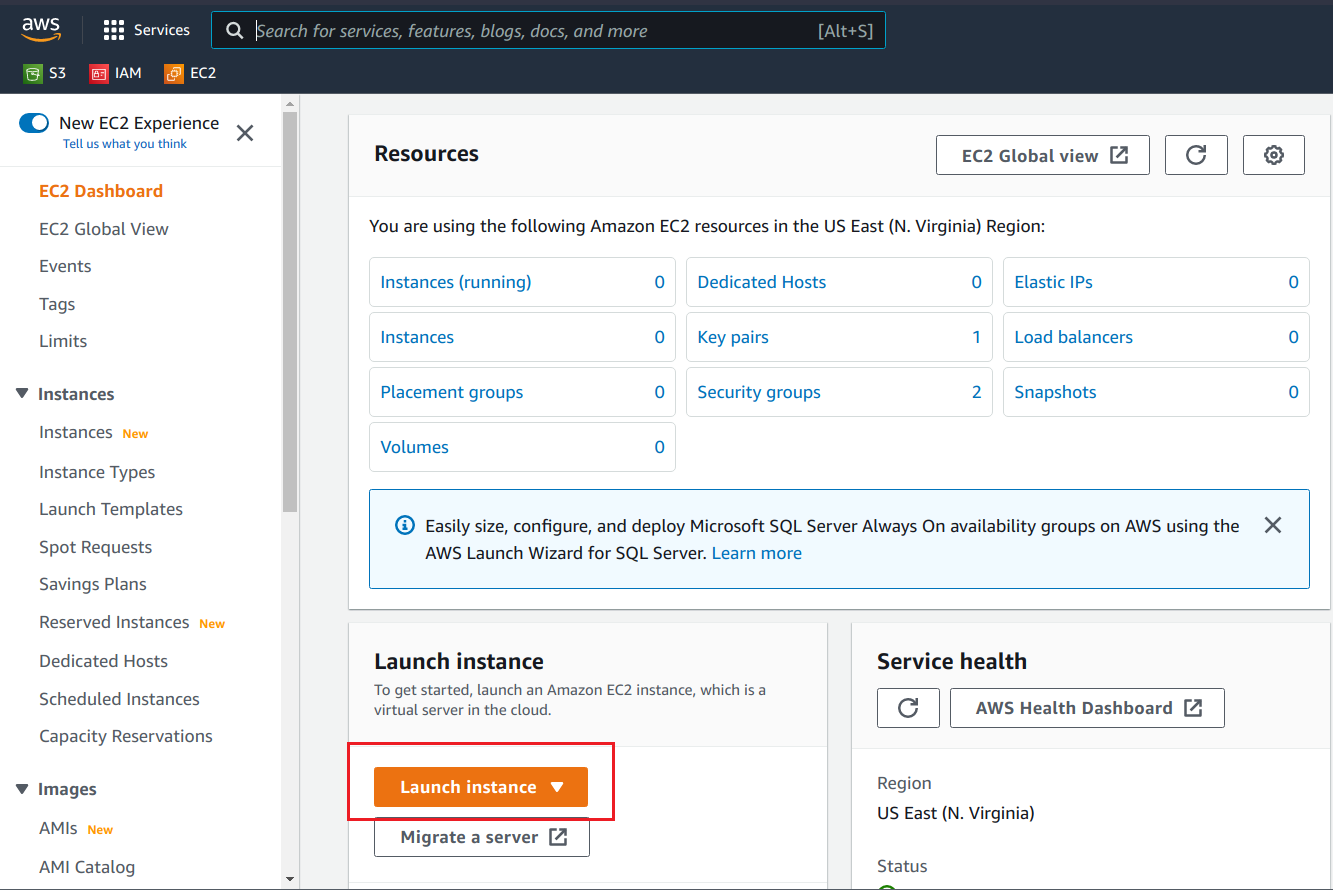
- We can create new instance in
EC2 Dashboardand clickLaunch Instance
- Provide
namefor the instance underName and Tagssection. - Select
Amazon Linux OSfree tier in Amazon Machine Image (AMI) - Create new key pair and download
.pemfile in local system to use for accessing cloud - Leave the rest as it is and now, we can see our launched instance.
Accessing cloud via SSH from terminal
Note: This can be done through puTTY too.
Copy/move the EC2 downloaded keypair to .ssh folder. Here I named my .pem file as dataengg.pem
$ mv dataengg.pem ~/.ssh
Try to connect SSH by the following command where XX is the public IP address in the created EC2 instance.
$ ssh -i dataengg.pem ec2-user@XX.XXX.XXX.XXX
The above steps would connect to instance or else, you would face the below error:
$ ssh -i dataengg.pem ec2-user@xx.xxx.xxx.xxx
The authenticity of host 'xx.xxx.xxx.xxx (xx.xxx.xxx.xxx)' can't be established.
ED25519 key fingerprint is SHA256:Gq1KnFeFtkLreTRn3hjOE6Pq68CHWjmymF1j+bjJums.
This key is not known by any other names
Are you sure you want to continue connecting (yes/no/[fingerprint])? yes
Warning: Permanently added 'xx.xxx.xxx.xxx' (ED25519) to the list of known hosts.
@@@@@@@@@@@@@@@@@@@@@@@@@@@@@@@@@@@@@@@@@@@@@@@@@@@@@@@@@@@
@         WARNING: UNPROTECTED PRIVATE KEY FILE!          @
@@@@@@@@@@@@@@@@@@@@@@@@@@@@@@@@@@@@@@@@@@@@@@@@@@@@@@@@@@@
Permissions 0664 for 'dataengg.pem' are too open.
It is required that your private key files are NOT accessible by others.
This private key will be ignored.
Load key "dataengg.pem": bad permissions
ec2-user@xx.xxx.xxx.xxx: Permission denied (publickey,gssapi-keyex,gssapi-with-mic).
The above error is due to file permission errors. To do solve this, follow below steps:
$ chmod 600 ~/.ssh/id_ed25519

$ sudo chmod 600 ~/.ssh/dataengg.pem
Run again SSH with keypair and it’d connect EC2 successfully.
$ ssh -i dataengg.pem ec2-user@XX.XXX.XXX.XXX

       __|  __|_  )
       _|  (     /   Amazon Linux 2 AMI
      ___|\___|___|

https://aws.amazon.com/amazon-linux-2/
[ec2-user@ip-172-31-xx-xxx ~]$ du -ah
4.0K    ./.bash_logout
4.0K    ./.bash_profile
4.0K    ./.bashrc
4.0K    ./.ssh/authorized_keys
4.0K    ./.ssh
16K     .
[ec2-user@ip-172-31-87-169 ~]$ exit
logout
Connection to xx.xxx.xxx.xxx closed.
Warning: It is wise to shut down our Instance once our job done to avoid unwanted bill from AWS.